How to replace motorcycle sprockets
Save a bit of money and learn how to change your sprockets at home.

Motorcycle sprockets are one of the items on your motorcycle that go through regular wear and tear and will need to be replaced over time. Power is sent to the rear wheel through the chain and sprockets, and after regular use over thousands of kilometers, even the cleanest and most well lubricated chain and sprocket set will wear out. Apart from regular wear and tear, sprockets can also be replaced if a rider seeks to change motorcycle gearing. Going for a smaller front sprocket will provide more aggressive acceleration and gearing, and a larger front sprocket will provide a more relaxed gearing built for top speed over acceleration.
Whether you’re going for a fresh set of sprockets to replace an old and worn out set, or simply changing sprocket sizes for a bit of gear ratio tuning, the endeavor of changing your front and rear sprocket is a relatively easy task which shouldn’t take more than an hour or two. Here’s how you can replace your motorcycle sprockets.
Preparation

In almost any maintenance task, preparation plays a big role in making sure that your repair job goes smoothly. In the case of replacing motorcycle sprockets, making sure that your chain is clean goes a long way in preventing a big mess when dealing with the chain and sprocket. To clean the set, spray a generous amount of chain cleaner (kerosene will work if you don’t have a chain cleaner product) onto the chain and sprockets, scrub, and wash down with water. After your chain is free of old lube and is dried out, proceeding with the sprocket change will be less of a mess and will be a lot easier to work with.
The next step for preparation would be to loosen up the chain. Loosen up the rear axle bolt and the axle adjuster nuts. Once the rear wheel has come loose, set the rear wheel as far front as possible in order to maximize chain slack. This will allow you to work on the sprockets without any chain tension issues which will allow your sprockets to come off quite easily.
Front sprocket replacement

Replacing the front sprocket is a relatively simple task which can be done while the motorcycle rests on the side stand. Simply remove the front sprocket cover to access the front sprocket. The cover is typically secured by a few 8mm or 10mm bolts, and should come off without any special tools. Once the cover is out of the way, it’s now time to remove the front sprocket. Put your motorcycle in gear in order to lock the sprocket in place, and untighten and remove the sprocket nuts (or bolts) in order to free up the sprocket.
Once the nuts and bolts are removed, the sprocket should come free with relative ease. Grab your replacement sprocket and proceed to install, this time following the reverse sequence of the removal. Make sure to tighten the sprocket and sprocket cover bolts and nuts to the recommended torque specification of the manufacturer in order to avoid stripping or seizing threads.
Rear sprocket replacement

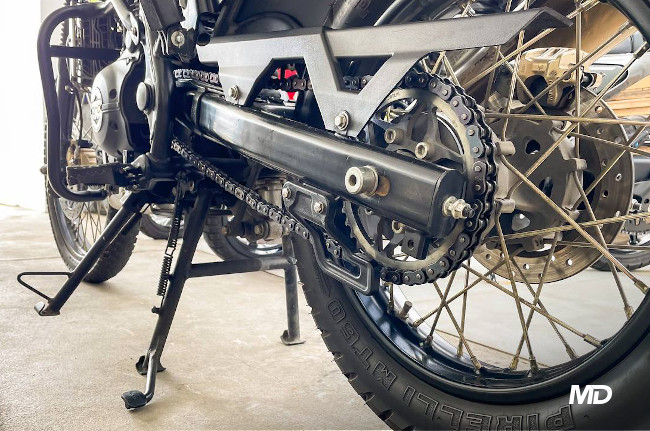
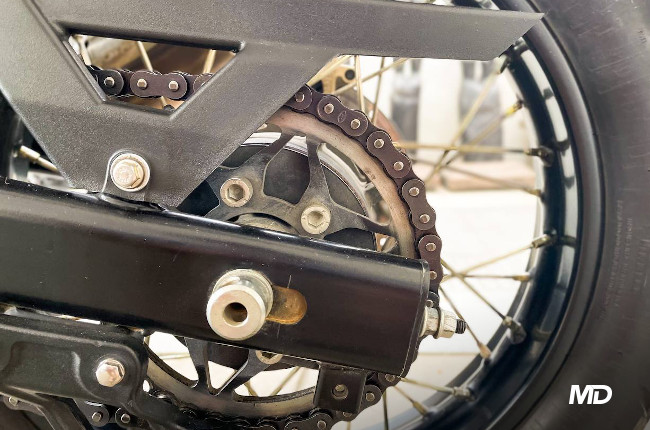
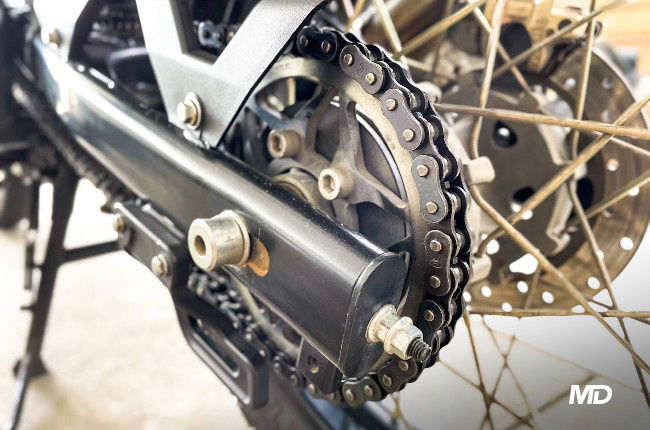
Replacement of the rear sprocket is slightly more tedious when compared to the front sprocket replacement, but should still be relatively easy for the average DIY-er. Unlike the front sprocket removal, the rear sprocket will require a center stand or paddock stand since the entire rear wheel will need to be removed. Once on a stand, proceed to remove the rear wheel by unseating the chain from the rear sprocket, disconnecting any connected brake components, and removing the axle bolt. Once the rear wheel is out of the swing arm, you can now proceed with replacing the rear sprocket altogether.
The rear sprocket is typically held by a few bolts which can be removed using a regular wrench or allen key, depending on the configuration of your respective motorcycle. Once the old sprocket is removed, simply install the new sprocket and tighten up the bolts. Ensure that the bolts are tightened in a star pattern and is tightened to the specification of your service manual. Once tightened, reinstall the rear wheel following the reverse method of how it was removed.
Final check

Once your sprockets are installed and before you re-tighten the rear wheel alignment nuts and axle bolt, it’s important for a rider to ensure that the motorcycle is in the proper specification for chain slack, rear wheel alignment, and chain lubrication. Proper chain slack and chain lubrication will maximize chain and sprocket longevity, and rear wheel alignment will ensure tire longevity and rider safety. Once all of these items are properly attended to, simply ensure that all nuts and bolts are tightened to specification, and you should be good for your next ride out on your brand new sprockets.
Related Articles
-
5 DIY maintenance jobs that can save you lots of money / Featured Article
Here are 5 do-it-yourself maintenance jobs that you can learn. Doing these maintenance items yourself not only help you learn more about your bike, but will help you save money in the proces...
-
5 things that could save your life during a motorcycle-related emergency / Featured Article
Find out how you can help prepare yourself for a variety of emergencies on the road.
-
These 3 signs tell you it's time for a new chain and sprocket / Featured Article
Never ignore these 3 warning signs that could mean that your bike needs a new chain and sprocket.
-
Follow these 3 tips to extend the service life of your motorbike’s battery / Featured Article
A motorcycle’s battery is considered as the heart of its electrical system, as such, taking good care of your battery can dramatically extend its lifespan.
-
Is your motorcycle out of warranty? Be sure to check these items ASAP / Featured Article
If your motorcycle is out of warranty, it’s now your duty to make sure you stay on top of its maintenance no matter what, or run the risk of facing a hefty repair bill.
Latest Features
-
Last-minute Christmas gift ideas for your rider friends and family / Featured Article
Struggling to think of gift ideas for your motorcyclist friends and family? Read on to get some inspiration this gift-giving season.
-
Ride a naked sportbike? Get these 5 upgrades first / Featured Article
Here’s a quick list of 5 upgrades to your naked sportbike to enhance your riding experience.
-
Motorcycle 101: The inner workings of a slipper clutch / Featured Article
Slipper clutches are awesome as they make for more forgiving downshifts and a lighter clutch lever. Let’s take a closer look at them and see how they work.


