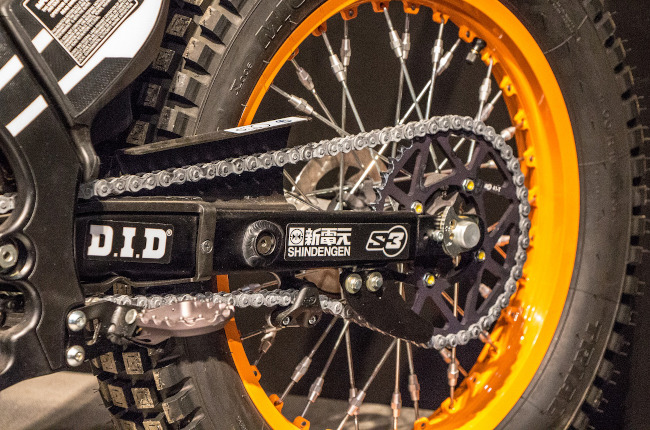
How to replace your motorcycle's chain
Is your chain due for a replacement? Here's how you can attend to this at home.

The chain of a motorcycle is one of the most abused consumables found on your bike. On any given ride, a motorcycle chain spins for tens of thousands of times while being exposed to dirt, water, and road debris in the process. Chain cleaning and lubrication can go a long way in ensuring that your chain doesn’t deteriorate prematurely, however, there will come a time that a chain will need to be replaced as it naturally stretches itself out over time. If you’re looking to replace your chain at home, or are simply curious as to how a chain is replaced, here’s how you can properly replace your motorcycle’s chain.
Prepare the motorcycle

The first step to replacement would be preparing your motorcycle for the job. Set your motorcycle up on a paddock stand or on the side stand and proceed to remove the front. sprocket cover and chain guards on your motorcycle. This step will allow you to freely move the old and new chains around the swing arm during disassembly and assembly. If you’re feeling like taking things a step further, you may also clean the old chain prior to disassembly if you’re in the mood to keep things spotless.
Remove the old chain

The next step after preparation would be the removal of your old chain. Motorcycle chains are often disassembled through a master link which is where you will want to start. Grab a pair of long nose pliers and proceed to remove the master link clip. Once removed, half of the master link can simply slide out with a bit of force. If your master link is being a bit stubborn, you can also use a chain tool to press out the master link. If your chain does not have a master link, you can simply remove the chain by pressing out a link with your chain tool which would split your chain in half for easy removal.
Remember that worn-out chains are often accompanied by worn-out sprockets. If you’re replacing your chain, make sure to replace the sprockets along with it to maximize the lifespan of your chain and sprocket set.
Clean the new chain

Now that your old chain is off, preparing your new chain for installation should be the next thing on your plate. Brand new motorcycle chains are often lubricated with grease from the factory which will fling all over your motorcycle if not properly cleaned beforehand. Simply get your cleaner and cleaning tool and proceed to clean off all the factory grease from your new chain. Degreaser or kerosene would work best as a cleaner, and a spare toothbrush would aid greatly in cleaning your chain. Afterward, clean the chain off with water and dry it off with a clean towel.
Installation and lubrication

After a thorough cleaning of your new chain, installation should be relatively straightforward. Simply split your new chain in half through the master link in the same way your old chain was split, and install it on your motorcycle sprockets. Afterward, reassemble the master link and ensure that your chain is tensioned correctly and your rear wheel is properly aligned. Once everything is properly tensioned and aligned, your sprocket cover and chain guards can now go back on your motorcycle for final assembly. Once everything is back on your motorcycle, simply lubricate your chain with your desired lubricant and feel free to ride out with the peace of mind of having a brand new chain.
Related Articles
-
5 DIY maintenance jobs that can save you lots of money / Featured Article
Here are 5 do-it-yourself maintenance jobs that you can learn. Doing these maintenance items yourself not only help you learn more about your bike, but will help you save money in the proces...
-
5 things that could save your life during a motorcycle-related emergency / Featured Article
Find out how you can help prepare yourself for a variety of emergencies on the road.
-
These 3 signs tell you it's time for a new chain and sprocket / Featured Article
Never ignore these 3 warning signs that could mean that your bike needs a new chain and sprocket.
-
Follow these 3 tips to extend the service life of your motorbike’s battery / Featured Article
A motorcycle’s battery is considered as the heart of its electrical system, as such, taking good care of your battery can dramatically extend its lifespan.
-
Is your motorcycle out of warranty? Be sure to check these items ASAP / Featured Article
If your motorcycle is out of warranty, it’s now your duty to make sure you stay on top of its maintenance no matter what, or run the risk of facing a hefty repair bill.
Latest Features
-
Last-minute Christmas gift ideas for your rider friends and family / Featured Article
Struggling to think of gift ideas for your motorcyclist friends and family? Read on to get some inspiration this gift-giving season.
-
Ride a naked sportbike? Get these 5 upgrades first / Featured Article
Here’s a quick list of 5 upgrades to your naked sportbike to enhance your riding experience.
-
Motorcycle 101: The inner workings of a slipper clutch / Featured Article
Slipper clutches are awesome as they make for more forgiving downshifts and a lighter clutch lever. Let’s take a closer look at them and see how they work.


